 Today is the Indie Author Resources Blog Fest! I’m sharing my best indie author resources—and this Thursday, I’ll also premiere a self-publishing nuts-and-bolts column at Janice Hardy’s blog, The Other Side of the Story!
I’m a planner. I tried to go about doing everything the exact perfect way, and I spent six month seriously working on the run-up before I published my first book—after it was written and polished and prettified.
The legal stuff: setting up your publishing company
I am not a lawyer! This is not legal advice! This is the process I followed.
- File for a Doing Business As (DBA) with the state to create a sole proprietorship
- File for a federal EIN with the IRS
- File for a state tax number
- File for a city/county business license
When using your FEIN with a DBA, remember that you need to use your name, not your DBA’s. This gave me a bunch of problems with signing up with Nook Press, until I called the IRS and asked. (I heard a rumor that they actually want to make sure you do your taxes right, so they answer questions. Gasp. Same with the state tax commission. They’ve answered my questions that would seem extremely stupid to anyone who’d done this before.)
I bought my ISBNs direct from Bowker. Since my publishing plan (and my writing file!) already includes more than 10 ISBNs (one print and one digital per book), I bought a block of 100.
The writing
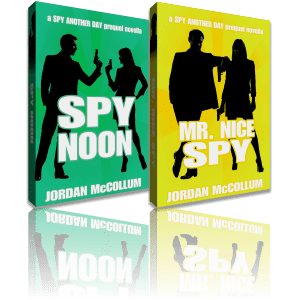
I’ve had the privilege of working with some great editors. Angela Eschler and Heidi Brockbank edited I, Spy, while Jenn Wilks came through with fantastic rush jobs on Mr. Nice Spy and Spy for a Spy.
Of course, I have to give major credit to my critique partners, Emily Gray Clawson and Julie Coulter Bellon. They are basically my content and structural editors, and they are phenomenal. But they’re not for hire, sorry.
The pretty stuff: design, layout & formatting
You know how they say you can have a job done good, fast and cheap—just pick two?
They’re wrong. Steven Novak, my cover designer, is talented, fast, and very reasonably priced! He is the reason I wanted to do this blog fest, and I cannot recommend him highly enough (and I’m ecstatic to be sharing more of his work this week!!). With my first cover, I had so many revisions even I wasn’t sure what I wanted anymore, but Steven put up with all of my changes. As soon as I nailed down my vision, he nailed the perfect image, and I fell in love with my first cover.
DIY Queen: everything else I did myself
I put the indie in indie author. I really like to go my own way, so I did a lot of the work myself. By hand. So instead of sharing service providers, I’m sharing links on how I learned these skills.
I did my own ebook formatting. To format an ebook from scratch, if you have knowledge of DOS, HTML and CSS, the tutorial at BB eBooks is excellent. It took me a couple days to learn everything and create the necessary files, but I can use that book as a template. I made the images for the book interior in a free image editor, Paint.NET, except, of course, my author portraits, which were taken by award-winning photographer Jaren Wilkey.
I also did my own print interior layout. I learned many principles of interior book design and book typography from The Book Designer blog written by Joel Friedlander. His guides to book design were indispensable. He also offers affordable print book templates for Word, but I finalized my design a couple weeks before he premiered them, dang it. For finding free commercially licensed fonts, I recommend FontSquirrel.
I’ve used CreateSpace and Alexanders for printing my book. Brigham Distributing is my distributor.
(My books are a labor of love. I’m not getting into the business of formatting print or e-books, and although I love you dearly, I won’t do it for you.)

 1. The theme is Indie author resources. It’s all about showing some love for all those people who helped make your book great. So who do you put in your post?