Work in Progress Check-in

In the wake of NaNoWriMo, many of us have just finished a new novel. Now what? Here’s what I’m planning to do in writing this month. Come share your plans, too!

So, that Nano novel…

We talked a little about my Nano novel. The first week of the month I devoted to editing my Nano novel—the final polish on the last section of pages on my Nano 2011 novel and a critique group meeting for those pages, and exporting my Nano 2012 novel into Word.

Something old, something new

Aiming really high, I’d love to spend the next couple weeks working on a short novella, a prequel to another piece, from a minor character’s POV. My first draft goal would be around 18,000 words, and at the rate I write, that should be two weeks of work fairly easily.

And then?

Time off for the holidays! That’s all I’ve got planned writing-wise for the rest of the year, but there’s always lots more on my plate (case in point: some of the handmade gifts I’m planning this year).

How about you? What are your writing plans this month? Come join in the conversation!

Exporting from Scrivener to Word, happy style

Even if I decide to spring for Scrivener, I still have some fairly awesome editing tricks that only work in Microsoft Word. So I needed to figure out how to get my first draft out of Scrivener as cleanly as possible—especially since the Nano version Scrivener trial expires tomorrow, and I definitely won’t get it before Christmas.

So after some experimentation, I figured out the best way to get my manuscript in Word format without requiring a ton of reformatting. Here’s a screen-by-screen guide to make it easy to export from Scrivener into Word.

Preparation

First, I put every. single. chapter. in its own folder. Even if it was only one scene (file), I made sure it was in a folder, all at the top level (though I think the level isn’t terribly vital). I also made sure the folders themselves didn’t have a scene written in them—only nestled safely inside. (I also moved my character notes, etc., into the Manuscript folder just in case I don’t go for Scrivener.)

That took about an hour. You don’t have to use that exact structure, but be sure to use something systematic and remember what it is!

If you want it to generate your title page, be sure to fill out the appropriate title page information (above Manuscript).

Begin the compile

Once you’re organized, click the Compile button.

START with Novel Standard Manuscript Format or Times 12pt with Bold Folder Titles. The automatic output is not how I format my manuscripts nor is it the standard format that I’ve seen from publishers and agents (“Standard” claim notwithstanding), so I customized it to provide a clean manuscript I won’t have to heavily reformat by hand.

CONTENTS

Make sure all the appropriate files (folders & files) are checked—no check mark, no file. If you forgot to check the “Include in compile” check box on the scene, you can fix that here. Also, if you put any of your notes in the compile, you might have to check those as well.

Because of the way I was customizing my manuscript, I UNchecked all of the Pg Break Before and As-Is boxes. (Honestly, I don’t know what the second one does.)

SEPARATORS

This is where you need to remember how you organized your files and folders. The way that I organized mine, I could be sure that if there were two files next to one another, they were scenes in the same chapter, so they needed to be separated by a # or a *** or whatever you use. If a folder came before a folder, they were part of the same chapter. I didn’t have any folders next to folders, but when a file came before a folder, it was the beginning of a new chapter.

So under separators, remember how you’ve organized your files so you can tell it how to separate them. If you use the same system as me, here’s how I set up my separators.

Text Separator: Custom: # (or ***) — Two adjacent text files are always two scenes in the same chapter, so they’ll need a break like this.

Folder Separator: empty line — For me, I didn’t have this in my manuscript, so it didn’t matter.

Folder and Text Separator: empty line — The way I organized my files, there was never any text in the folder itself. This separator, then, controlled only the break between the chapter heading (CHAPTER ONE) and the beginning of the text. The default setting puts the chapter heading on its own page (but there’s another setting you have to tweak to fix this).

Text and Folder Separator: page break — With my organization, a folder that followed a file was always the beginning of a new chapter. So, new page.

FORMATTING

If you have formatted your text in Scrivener—using italics, or bold, or changing the fonts—uncheck Override text and notes formatting.

If your chapter (folder or file) titles are descriptive and part of the manuscript, make sure that the Title box is checked—but if you want Scrivener to automatically number your chapters, uncheck Level 1+ folder Title.

I tried clicking OPTIONS… and telling it to Place notes after main text. I was expecting this to put the Document and/or Project notes after the appropriate section, but I didn’t see those notes. (Mine weren’t very extensive so I just ported them by hand.)

UPDATE: A Scrivener rep stopped by with this handy tip in the comments. To export your notes:

You need to check off “Notes” in the Formatting pane grid. It’s to the left of “Text”. The option to place notes before or after the main text is irrelevant until that checkbox is on. When Notes are added, they will be presented in the preview editor, and can have independent formatting applied to them from the main text.

Now, if you’re using the same organization (i.e. folders hold chapters), and you do NOT want the chapter header on its own page or in Courier New, select the folder. Click the Modify button below.

This opens the menu to format the chapter headings. Adjust the Page Padding if desired (I believe this is the number of lines it skips before and after the chapter heading). Want “Chapter” instead of “CHAPTER”? Click on Section Layout…, select the Case tab and change Title Prefix to Normal. You can also click the A to set the font, size and other options.

TRANSFORMATIONS

To export to Word, you don’t need it to transform these things—smart quotes, em dashes, etc., have long been “standard” in manuscript format (as has TNR, but hey). So I recommend unchecking everything here.

I didn’t use Replacements or Footnotes/Comments, so the only other customizations were with . . .

PAGE SETTINGS

The default for the running header font is Courier New, even if your MS is in Times. So by Header font:, click on Choose… to change that. (It generates a header of Last name / TITLE / p#.)

If you’re using a title page, make sure Not on page 1 is checked. If you’re not using a title page, that’s up to your discretion.

Almost done!

COMPILE FOR

On every screen, just above the Compile, Save & Close and Save buttons, there’s a Compile For pull down menu. You can select Word and have it save as a .doc automatically.

Click the Compile button and voila! A clean manuscript!

Important note! Scrivener does not hyphenate compound numbers in automatically numbered chapters. So, basically 21-29, 31-39, etc., are misspelled, and you’ll have to add the hyphens by hand. But seriously, that was the least time consuming part of all my experimentation.

I consulted this post on compiling from Scrivener by Gwen Hernandez, author of Scrivener For Dummies, but figured out a whole lot with six experimental compiles.

What do you think? How do you compile from Scrivener?

What’s in a name?

Although the very first draft is “done,” I haven’t totally settled on a working title for my Nano novel. I’ve got two titles in mind. I’m using one because I like it better, but I kind of feel like the other one suits the book better.

The two candidates? Slash and Burn and Scorched Earth.

About the book

A quick synopsis of the premise:

The war for Earth is over. But the battle’s just begun.

In a depopulated post-apocalyptic California, 17-year-old Adrienne Lucas has finally found some semblance of normalcy in a collective farm led by her father. Then newcomers arrive, promising a return to the comforts from Before. Adrienne’s father represents the voice of reason against the newcomers’ siren song—until they silence him forever.

Adrienne’s devastating loss is compounded when she discovers the man she’s loved for years, the man who saw her father as practically his own, the man who lives in her home as part of her family is also the man who betrayed her father and sentenced him to death.

Now Adrienne will destroy them all. Starting with him.

Or, in video form:

Don’t see anything? Click through to view the trailer!

You can read a little more about the project here.

What the titles mean to me

I was discussing this with a wise writing friend (who will GO PLACES), Wendy Swore, at a retreat last month. She asked a very incisive question: What do the titles mean to you?

Naturally, my interpretations of both of the titles have a lot to do with the origins of the phrases, but there’s a lot more to the psychological processes drawing me to them.

Scorched Earth refers to a war-making policy of attacking civilians and burning down everything in your path. Sherman’s March to the Sea is often used as an example (and I’m Southern, though not Georgian).

But I think the reason why this popped into my mind was a blog post I read earlier this year that stuck with me. Nathan Bransford very candidly discussed the implications of divorce in the Internet era, and he mentioned his ex-wife had pursued a “scorched Earth” policy in social media, deleting her Facebook account and blog and starting over. While he avoids rancor in his post, the image stood out in my mind.

To me, “scorched earth” brings to mind images of leaving a wide, blackened swath in your wake.

Slash and Burn has some similar connotations, of course. It denotes a agricultural technique for clearing land: slashing and burning the existing underbrush. (Sounds kinda dangerous.) The agricultural angle is kind of nice, since the main characters live on a collective farm.

“Slash and burn” is a little more proactive, in a way. You’re not just burning as part of total war, a reaction to your enemy. You have a purpose, a goal, and you’re taking the initiative. In reality, it isn’t as violent as it sounds, and the blackened swath here becomes the fertile fields of future growth. But it leaves the same image of destruction, which is very appropriate for the novel. Or, at least, I want it to be and hope it will be after revisions 😉 .

The covers!

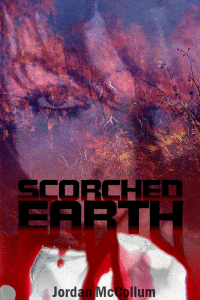
I made up a book cover this year, because I love looking at my mock covers for a little burst of inspiration. As always, it’s a very rough draft, but here’s the idea:

Come vote!

What do you think? Which title attracts your attention more?

What images and connotations do these titles bring to mind for you? Come share your thoughts!

Photo credit—Burning Fields IV by Gary Scott
COVER IMAGES: Girl: Self-portrait by Kelsey; Fire by Marion Doss;
Blood drips: Pooling Blood by Joleene Naylor; all via CC

TBR Tuesday: Christmas Wish List!

New feature! On Tuesdays, I’ll share books I’m reading or want to read. Come share your TBRs!

Sad but true: in my family we’re dependent on Amazon Wish Lists to make Christmas gifts easier. So here are 10 books on my Amazon Wish List this year:

Nonfiction: for writers


The Emotion Thesaurus: A Writer’s Guide to Character Expression by Angela Ackerman & Becca Puglisi
*


We Are Not Alone: The Writer’s Guide to Social Media by Kristen Lamb

What does this say about me? I’m super picky about what writing books I pick up, having read so many. These are two I don’t have.

* In the time between writing this post and finalizing it, I found out I’ve won a copy of The Emotion Thesaurus in a drawing. How cool is that?! But still on my list because it’s pretty awesome.

Fiction


Endlessly by Kiersten White


Much Ado about Magic by Shanna Swendson


Feedback by Robison Wells


Mind Games by Kiersten White


Transparent by Natalie Whipple

What does this say about me? I read a lot of YA spec fic and otherwise magical stuff. This is particularly weird considering that I don’t write anything like that.

Nonfiction: research


Thwarting Enemies at Home and Abroad: How to Be a Counterintelligence Officer by William R. Johnson


The Craft of Intelligence by Allen W. Dulles


The Craft We Chose: My Life in the CIA by Richard L. Holm

What does this say about me? I’m researching the CIA and tradecraft. 😉

In general, I’m very picky about what I put on Christmas wish lists. I don’t want my loved ones to waste their gift money! I try to pick only books that I’m pretty sure I’ll love.

What books are on your Christmas wish list? Why? Come join in the conversation!

Setting up your email newsletter freebie with MailChimp

Last week, we talked about creating an author email newsletter. I mentioned that offering a freebie is a great incentive for sign ups. My freebie is a free plotting/revision roadmap, for example.

What I didn’t mention was how, exactly, to make that happen with your newsletter. A friend asked me how to set it up, and I realized it might be good to explain it more generally, too. It took a while to figure out all this, but it’s not too hard to do, and it’s free. I only know how to do it with MailChimp. If anyone else is familiar with other email list service, please share in the comments!

First, I customized the confirmation emails. To customize your messages, go to the Dashboard in MailChimp, and then to Design a Form. On the Design a Form page, there’s a pull down menu of Forms & Response Emails you can view and edit.

I customized the Signup Form, Signup “Thank You” Page, Opt-in Confirmation Email and Final Welcome Email to mention the freebie (and to match my site colors—click Auto-Design to get started here). Just click on the text box and add some text.

Here’s the important part: for the Confirmation “Thank you” Page, use the box labeled “Instead of showing this thank you page, send subscribers to another URL.” If you have hosting for your website, you can upload a PDF file, for example, to your site and send readers directly there, or to a page to say thank you and link there. (But make sure the page and file are hidden from users & search engines).

If you don’t have hosting for your site, you can upload a freebie doc to Google Drive. Open the document in Drive, click on the “Share” button in the upper right, and Change the sharing settings. Set the privacy to “Anyone with a link can view this page,” and make sure the “Access: Anyone” option is set to “Can view” (you don’t want them editing your freebie!

Then use the same box as above with the Confirmation “Thank you” Page to go to the link. You can also turn off the Final Welcome Email if you’re using it; I’m tempted to turn it off anyway, but I like having the backup link to my freebie there just in case.

Now you’re all set up!

What do you think? What would you offer for a freebie? What would you like to see for a freebie? Come join the conversation!

Will Scrivener work for you? (& NaNoWriMo Finale!)

About to win Nano? Congrats! Don’t forget to verify your word count, or you won’t get your winner goodies—and one of those goodies is a coupon for 50% off the writing software Scrivener, which brings it down to $20 for Windows and $22 for Mac. On the Nanowrimo page, just click on My NaNoWriMo and select “Validate my novel.” Then cut and paste your text into the box.

On Scrivener, you’ll probably have to compile first. I had mine just output to an RTF file . . . and then I had to “adjust” it a little to match the word counts across Scrivener, Word and the Nano site.

Speaking of Scrivener, I tried it for Nano, and I’m honestly not 100% sure I’ll stick with it. Here’s what I thought—and we’ll discuss how to figure out if it will work for you!

What I like about Scrivener

I do like having character sketches and a little bit of my research (although there wasn’t much for this book) right there. Most of my research this time around was deep background, so it wasn’t worth saving. (Would this be enough X? Yes, great, moving on.)

One of the major features seems to be the ability to drag and drop a scene or chapter to a new location in the story, which I don’t really do with most of my books, probably because I largely write in sequential order. More often I have to move little parts of scenes, and then it’s still cut-and-paste. On the other hand, I decided I didn’t care for where my scene breaks fell in the last quarter of the document, so I merged the entire quarter into one file, and I’ll be able to split it up later.

I liked using the cork board and outline views to make sure I was going in the right direction, and to have my outline and notes integrated into the same program/document-type-thing? as my actual draft. It was also nice to be able to see the scene card and make notes on the scenes (and the whole project) in the same window as the writing screen. The full screen view was also nice for focusing, especially when I used my working timer.

I hear Scrivener also has excellent output for ebook formatting. Another great advantage is that if you’re writing a series, you can copy your characters, settings and research to a new project with ease, keeping things consistent.

What I don’t like about Scrivener

For me, the biggest problems with Scrivener were mostly software problems. I found a few “quirks” in the program annoying, especially that Outline view consistently forgot what columns and widths I meticulously set. It was a little slow on start up (perhaps comparable with Word there, though) and displaying the full manuscript in scrivenings mode.

Of course, I also didn’t like the feeling that I was only using a tiny fraction of the program’s potential—or, conversely, that I just had no idea how to use some of the features. (I still don’t quite get how the Collections are different.)

But really what it comes down to is: is this really that much better of a program than Word? As far as the word processing itself, I have to think the answer is no. Features like a decent built-in Autocorrect a decent spelling dictionary and more do make a different to me.

For me, I think the bottom line is Scrivener does more than Word, but it doesn’t do what Word does as well as Word can.

Will Scrivener work for you?

Some of deciding whether Scrivener will work for you depends on how you use your current word processor. For example, I use Word macros for editing my gesture & word crutches. To my knowledge, Scrivener doesn’t have an equivalent function, so if I use Scrivener long term for drafting, I’ll probably go to Word for editing.

Also, my critique partners use Word and I can be sure they’ll get exactly what I send them when I use the same program. If you do your editing online, or use the track changes and/or comments features on a lot of your editing, then Word might still be a necessity, too.

I used Scrivener on a new manuscript, and I think that helped my opinion. From what I’ve heard, importing an existing manuscript can be a challenge, and if you’re not yet committed to the program long-term, it doesn’t make sense to go through the effort.

The best way to tell if Scrivener works for you? Give the free trial a shot first.

Last year, the 50% off winners’ coupon was good through the following October. Of course, I didn’t get around to actually USING the free trial until November… Good thing I won again . . . if I decide to get it.

What do you think? Have you tried Scrivener? What do you like about it, and what don’t you like about it? Join the conversation—and tell me about your Nano!

Nano inspiration: Animoto

This entry is part 15 of 16 in the series NaNoWriMo success and inspiration

Warning: if you’re not done with Nano (or don’t have a comfortable bumper), you might want to file this away to read and experiment with another day.

If you are done with Nano (or nearly so), I have a free plotting/revision roadmap which you can get just by signing up for my newsletter (which is also pretty awesome, if I do say so myself).

All right, with that out of the way, today’s little bit of inspiration comes courtesy of my friend Deanna Henderson. She taught a class on creating a book trailer for free using Animoto at an online conference from iWriteNetwork last month. It took me 45 minutes to an hour total to make trailers for this year’s and last year’s Nano novels—once again, I didn’t bother with the instructional video, and hunting down good photos takes time.

Here’s last year’s Nano novel trailer:

Animoto offers paid options, which let you make longer videos, download your videos to your computer and generally just more, but the free options will let you create a 30-second video with your own photos, music and script and share it on the Internet. Not bad for free!

Here are the instructions from Deanna’s blog, with [commentary from me]:

These can be for anything; book trailers, author profiles, blog tours etc… let your imagination be your guide.

Step 1: Register your account. Go to www.Animoto.com

Step 2: Choose a style/template for your video [Note that the templates marked “Pro” are not offered in the free plan. Stick to the ones without the “Pro” label. I used Water for the one above, and Inkwell for this year’s.]

Step 3: Click on the small type below the purchase button that says Make a 30 second video for free

Step 4: – OPTIONAL – Watch the Animoto tutorial video, or close the box, continue to step 5

Step 5: Add pictures and/or video clips **Only use pictures you own the copyright for** [Big, HUGE life-changing tip: you can find FREE, licensed photos on Flickr (and several other places). You can use the advanced search’s Creative Commons options, or you can simply to go this search link and type in your query. If this is a book trailer, be sure you’re using works that are licensed for commercial use. Some of the photos require you to attribute the photos; I do this in the description section of the video for all the photos in order. You’re welcome.]

Step 6: Add desired text. [I’m just full of the hints today! It seems you can get more “slides” if you skip the Header portion.]

Step 7: Drag text to desired location. [You can drag and drop the elements of your video.]

Step 8: Add music. [Seems like a lot of the music that comes with Animoto is super upbeat, so if your novel isn’t, may I recommend “Redrum” by Ugress? For the video at the top, I used a song I licensed for something else.]

Step 9: Preview your video, it will take a minute to buffer first, be patient. When you watch it this time, the quality isn’t as high as it will be in the final product, don’t worry.

Step 10: Title your video, and give a description. [Where I put the photo and music credits]

Step 11: Click the Produce button.

****

Wait

****

Wait

****

Wait

****
Step 12: Now you can watch your video!

On the video’s display page, there are also buttons and links to share your video via Facebook, Twitter, and email. If you want to embed your video on your site (like I have here), Click on the “More” button beside the other sharing buttons. From there you have options to share via Pinterest, Twitter and a few popular blogging platforms. You can also use the “Embedded video” tab at the top of the popups to get the code.

Last year’s video only took a few minutes because I only had to find 2 new photos, plus one I’d already Pinned. This year’s took much longer with all the image and music hunting. I’ve already shared this year’s video, but here it is again:

Make your own photo slideshow at Animoto.

And the truth is: I totally watched this when my motivation was lagging as I was writing the MS. I think it’s especially helpful for that purpose because it gets down to the core conflict that made me want to write the book in the first place, so it was a great source of inspiration for me. I tracked down the song as well, since it had become linked with the book in my mind, and found it was free to download. So when that came up in my playlist, I was motivated all over again.

What do you think? Would you use Animoto for your inspiration video, or your book trailer? Come join in the conversation!

Email marketing for authors

Email marketing is sometimes considered the Holy Grail of online marketing—people actually giving you permission to market to them! It’s so coveted that sometimes the terms used to describe it are a little . . . aggressive (“Capture their addresses!” etc.).

But really, once someone gives you permission to contact them, they are that much closer to a real connection with you. Marketing isn’t just about shouting down from the rooftops. Unless it’s about building a connection, connecting with people who already like you, and helping new people to like you—all very personal, social things—your marketing will probably talk right over your subscribers’ heads.
And guess how long they’ll subscribe to that.

Today we’ll look at two sides of email marketing: how to get started and get email addresses, and then what to say in your emails!

Since we’re talking about email marketing, I’ll go ahead and tell you: I’m starting an email newsletter! You can sign up in my blog’s sidebar or on this form for free, exclusive updates and goodies—including a FREE plotting roadmap just for subscribing!

I know, I know, I said I was going to do offline marketing. And then I remembered two really important topics I haven’t covered for Internet marketing yet. So, soon.

Getting started with email marketing: set up

Let me put it bluntly: even if you’re a devout DIYer (which I am), you’ll want to use some sort of service to help you get email addresses, manage your list and create pretty emails (which I also am). Personally, I went with MailChimp—free for the first 2000 subscribers and/or 12,000 emails a month, with paid tiers. There are lots of other services out there. AWeber is another popular one. From what I hear, they are pretty much the best out there, but they’re also a paid service.

I’m not going to lie: this takes time. And even for someone who’s fairly computer savvy (i.e. me), it took several hours to really start to get the hang of MailChimp. Of course, some of that’s because I’m a devout DIYer and refused to watch the how-to-start videos. . . .

If you sign up with MailChimp, for example, you’ll want to create a list (where it will collect your email addresses—you can have more than one if you’d like), and probably customize your forms. You can do both of these from the Dashboard. I also spent some time creating the default template for my newsletters—and several hours creating the custom subscription form I’m using on my site.

Which leads us to . . .

Getting started with email marketing: finding subscribers

Your blog or website is probably going to be the main place you’ll find subscribers for your email list, so it’s important to have a subscription form somewhere. You might want to put it on a separate page, or prominently on the sidebar. It’s up to you—but if you want subscribers, make your sign up easy to see and find.

As I was thinking about how to implement my own subscription form, I instantly thought of one I’d just succumbed to. They offered a great incentive to subscribe: a freebie! When I went back to examine their signup form, as a marketer I definitely liked what I saw at SelfPublishingTeam.com:

What does this title and copy say? Benefits, benefits, benefits. This box in the sidebar not only catches your eye, but it tells you why you want to sign up and how signing up will help you.

It’s very easy to sink into a marketing trap of only thinking about the features—what we want to put in there, what’s in it for us, why we’re doing it. But remember, people like your subscribers are thinking about what’s in it for them. Show them by focusing on benefits instead of features.

And, hey, if you’ve got a freebie—a first chapter, a short story, or an informational product—sitting around, you can use it to sweeten the deal.

I also think it’s a good idea to tell your subscribers how often and when to expect your emails. (Monthly, at the beginning of each month, etc.)

Now, what do I say to these people?

That’s the hard part, huh? I subscribe to several author newsletters largely to try to figure out what kind of content I want in mine!

Remember your subscribers are most likely readers (and possibly also writers), so try to think about what you’d like to see as a reader. Here are some things I’ve seen in my friends’ email newsletters which seem like good ideas. Several of these can also double as the thing to “sweeten the subscription.”

  • Book releases and reviews. Even just a list of what you’re reading or looking forward to can keep your subscribers interested.
  • Sales, coupons and specials. These can be especially fun or useful if you’re self-publishing and have more control over these things.
  • Giveaways. Who doesn’t like free books (your own or others’), or useful items that tie into your book (a scarf like one your character wears, for example)?
  • Highlight (but don’t repeat!) your blog content. Many of your newsletter subscribers already read your blog. You can highlight specific posts or the discussions in the comments, but don’t make your newsletter a cut-and-paste recap of your blog!
  • Upcoming events. Of course you’ll want to highlight upcoming signings, launches, parties and speaking events. You may not have these in every issue—or you might!
  • Progress on your latest novel. Many of your subscribers may also read your books, if they’re published. Personally, I enjoy hearing about how the process is going for an author’s next work. But I’m a writer, so YMMV.
  • Sneak previews. You might also use your mailing list for sneak previews of content coming up on your blog, your latest project, your next cover, etc.
  • Freebies! Remember who your audience is. Right now, my blog audience is mostly writers, but once I’m published, I anticipate more and more of my blog audience will become readers. Over time, I’ll probably adjust what freebie I offer to appeal to readers rather than other writers.
  • Deleted scenes. Again, this focuses on your readers. It’s like watching the bonus features on a new movie—fun!
  • Polls and questions. Your email subscribers are often your most dedicated fans. If you need input from someone who cares about your characters and your books, this is where you should turn. Generally, however, lengthier discussions are better on more social fora like your blog or Facebook page.

What do you think? How do you see authors using email marketing well? What do you like to see in an author newsletter? Have you started your mailing list (or signed up for mine yet?)? Come join the conversation!