Book trailers: 19 ways to make them effective

This entry is part 3 of 7 in the series Marketing: social media

So, you’ve decided you want to do a book trailer. Awesome! Here are nineteen ways to make your book trailer the best it can be.

Watch other trailers first

Yes, yes, yes. You can go straight to YouTube to search, or you can just Google [book trailers] to find sites that showcase them.

See what you like, and what you don’t like, what works and doesn’t. See what professional-level book trailers look like, and decide what you want to do.

It probably won’t hurt to watch some movie trailers, too, to see how the big folks do it.

Learn how to do it yourself or hire it out

Most computers come with a movie making program these days, whether it’s iMovie or Windows Live Movie Maker. Surprisingly, these free programs are fairly adept, with dozens of included transitions and shot effects. If you have a free afternoon and aren’t totally tech backwards, I think you should be able to figure them out for a short book trailer.

And on that note:

Keep it short

Please, please. Remember that attention spans on the Internet—even for readers!—are very short. The absolute maximum I would recommend for a book trailer would be 90 seconds. Personally, I’ll spend all day reading a book but I won’t click on a 60 second video unless I already want to buy the book. A lot. But 30 seconds? Sure, why not?

Make it professional

This doesn’t mean you have to hire a book trailer company to make yours, but it does mean you need to put a high level of polish on anything you do. You can make a professional looking trailer yourself, absolutely—and see that you do. This goes double on hiring it out, whether that’s to your best friend’s second cousin or a book trailer company.

The professionalism of your book trailer should be reflected in all aspects: the images, the video, the shots and the sound. Yes, the sound. If you’re doing voiceovers, spring for a decent mic and test multiple “studios,” okay??

Use visual storytelling

Film/video gives a whole new meaning to the phrase “show, don’t tell.” It’s a totally different medium than the written word. I loved this analysis of visual storytelling by Miriam Paschal on Mystery Man on Film. It retells the opening shots of Back to the Future, showing just how deeply the images—no dialogue!—characterize Doc Brown and begin to set up his problem.

It starts with clocks: hundreds of clocks. There are vintage clocks and modern clocks. There is a Harold Lloyd clock with the man hanging off the arms of the clock, so we get some foreshadowing right away. We see the newspaper articles of how the old Brown mansion was destroyed, which we will learn later happened when Doc sank all his money into building the time machine.

We see the pictures of Thomas Edison and Ben Franklin, Doc's heroes.

Then we see the Rube Goldberg machine that Doc has built to streamline his morning routine. Well, it's not a classic Rube Goldberg machine, but it's inspired by one. However, something is wrong. The coffee pot pours hot water onto the hot plate in the absence of the pot…and coffee. Strange. . . . [Read the rest]

Writers work very hard to tell their stories in words, but trailers’ real strength is to tell the story in images. Play to the strengths of the medium—and still tell a story!

Write a script

You may be a pantser for your books, but you need to be a plotter when it comes to your book trailer. Think about those images and scenes from the visual story. (Before you run off and write it, keep reading, please.) You can absolutely use words, but you need to think about how you’ll handle those words in a primarily visual medium: live action dialogue? Floating text? Disembodied space voice?

Edit!
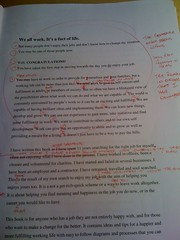
You wouldn’t send your first draft out to agents and publishers (I hope). Why do that with your book trailer script? Look for places where you can tighten the wording, focus on the visual storytelling, and create other effects. Polish it until it gleams—before you start shooting.

Remember, video is like decorating in that much of the time, it’s more about what you take away that makes the story strong.

Focus on the emotion

People read for emotions, and each genre has a different basket of expected emotions. You probably already know what those emotions are, especially if you read in your genre (which you do, right?). For example, in romance, we read to experience the heady feeling of falling in love, the uncertainty of the relationship in peril, and the happily ever after. Or we read thrillers to be, well, thrilled, to feel the uncertainty of the world tumbling down around us, and to execute justice in the end.

You don’t have to give away the ending, of course, but brainstorm some emotions that your readers want to feel, and will feel when reading your book.

Focus on the hook: attention grabber

Just like you open your book with a hook, open your trailer with a hook (possibly the same, maybe not). Grab the viewer’s attention right off the bat, whether that’s through something unexpected, or focusing on a major problem, or displaying the inciting incident.

Play to the audience

Like with the emotions, remember that your audience has certain expectations when they pick up a book. You genre has conventions, whether that’s a hard-boiled detective or magic or a plucky heroine. If your book has those, play them up (in an original way, of course, just like you do in your novel!)

Match it to the book
Your book itself sets expectations, with its cover (you really need to use the cover in the video), back cover copy, and even where it’s shelved. Try to dovetail your trailer with those elements, so that people can easily make the connection between your trailer and your book. Can you imagine watching a book trailer, then reading the back cover of what sounds like a totally different book?

Make it interesting

I hope this goes without saying, but a book trailer really, really, really needs to be interesting. One way to do this is to showcase what sets your book apart. You have magic, but it’s different because of X. You have a plucky heroine, but she stands out from the 10,000 plucky heroines out there because she’s Y. (And remember, show don’t tell!)

Short blurbs

If you have endorsements that will be used on your cover, your back cover, your inner material, or your website, include one to three of the most compelling examples—but make them very short and punchy. One word might not be bad. (Include attribution1)

Call to action

End with a call to action. The best book trailer in the world won’t be nearly as effective if you don’t end by telling the audience you’ve hooked what to do next. You might put a link at the end of the video, but be sure to include some text saying, “Go here to buy my book” or “Add my book on Goodreads” or “Like me on Facebook for deleted scenes.” Feature the cover prominently, too.

Use Creative Commons-commercial or public domain material, or buy the commercial license

If you use video, images or music made by someone else, this is an absolute must. You can find Creative Commons-licensed images on Flickr, for example, but be sure they are cleared for commercial use (yes, this is) AND derivative works (yep again). Alternatively, you can often buy the license for a photo, through Getty Images on Flickr, or through a stock photography site.

A book trailer is a direct piece of promotion for your book, and as such, is commercial. (I mean, hey, it’s a commercial for your book.) If you use someone else’s copyrighted work in your video, you could be construed as misrepresenting their work as an endorsement of yours. Let’s just say, “Big lawsuit,” mmkay?

Get feedback first

Before you throw your trailer up on the Internet, just like you would with your book, bring it to people whose judgment you trust—both people who’ve read your book, and those who haven’t. If they’re not used to giving feedback, be sure to prepare some pointed questions, especially “When did it confuse you?” (or “When did it lose you?”) and “When did it bore you?” You can also ask for positive feedback, too, of course 😉 .

Gather analytics

Just like I recommend using analytics on your blog or website, I think it’s vital to gather data on your video. If you use YouTube, for example, they automatically collect a good amount and variety of data on your video, including:

  • Number of views
  • Location of viewers
  • New YouTube subscriptions from the video
  • Viewer gender (no joke)
  • Sharing events, and the views that each of these generated!

This last one is incredibly valuable. You can see where your video was posted, and how many people watched it there.

Do you want other people posting your video? Um, yes. More on that now:

Make it shareable

Another reason I really like YouTube for book trailers is that it has some pretty easy-to-use embedding capabilities. People who like your trailer enough—or people who will be part of your book tour, or writing friends—can add YouTube’s automatically generated code to their blog and automatically increase your trailer’s potential audience.

Be sure to allow embedding of your videos!

Realistic expectations

Finally, after all your wonderful work, keep your expectations realistic. A book trailer probably will not automatically generate a bajillion sales. But if you remember our theory of marketing approach to book trailers, that every time someone is exposed to your book, they get closer and closer to potentially buying it.

Whew! Now you’re either pumped and ready to go, or completely paralyzed by fear.

Sorry.

More resources on book trailers
5 Tips for Making a Good Book Trailer from Abel Keogh
How to Make a Book Trailer, a guest post on Nathan Bransford’s blog
Kate Noble’s How I Made a Book Trailer for $5
Joanna Penn’s 11 Steps to Make Your Own Book Trailer
What key elements make an effective book trailer? from 30 Day Books
Michael Pryor’s 10 tips for book trailer makers
Top 5 book trailer tips from Book Baby
Literary Agent Rachelle Gardner: Should you have a book trailer?
A comprehensive guide to book trailers (list of links)

What do you think? What’s the best book trailer advice you’ve seen?

Photo credits:
watching movies—Q family; editing—Joanna Penn; books—Emily Carlin;
Creative Commons logo—Peter Leth; Sharing YouTube videos—Anne Adrian


Plotting a novel with a beat board

This entry is part 23 of 24 in the series The plot thickens (Mwahahaha)

Our series on plotting is a perennial favorite on the blog, so we’re expanding on that series with a few guest posts! Ali introduced me to Save The Cat! and I really loved using it on my most recent manuscript, so she’s here this week to explain the basics of this plotting method and how to use a beat board.

By Ali Cross
Used with permission from this post

I use a corkboard, (but you can use a wall, or whatever) and a stack of index cards (or sticky notes). My crit group just gave me a new package of index cards–they know me so well! Thanks guys! 

Don’t freak out over the size or color of your cards. Just use whatever. You can use colored pens if you want (I usually only use colored pens if I’m beating out a story with multiple points of view–each main character gets their own color.)

Now, using a couple strips of masking tape, divide your corkboard (or whatever) into four even sections (three strips of tape.) This denotes Act I, Act II part one, Act II part two, Act III.

It should look like this:

ACT I
ACT II part one
ACT II part two
ACT III

Now, get out your beat sheet and your index cards.

On your first card, jot down your notes for the Opening Image. Tack it/tape it/whatever right at the beginning of your Act I section.

Your next card is #6 on the Beat Sheet; the Break into Two card. Place it at the very end of the Act I section.

Next, #7, B Story, at the beginning of the Act II, part one, followed by #9, Midpoint, at the end of that section.

#10, Bad Guys Close In, goes at the beginning of the second Act II, followed by #13, Break Into Three.

Your last section starts with #14, Finale, and finishes with #15, Closing Image.

Now, fill out your cards for the remaining beats and tack them to your board where they belong. You’ve probably got some scenes in your head, so jot them down on a card and figure out where they belong. Your beat sheet should give you a pretty clear idea where it goes on the storyboard. Go ahead and stick your cards up there.

Action scenes, or beats that involve multiple scenes to play out, get stuck to the board in cascading groups. You can see what I mean in the photo of my board:

It’s easy to see where the holes are, but I’m not worried. In fact, I’m kind of happy about it. This outline keeps me in line by pinning down the beginning, middle and end, but allows me the freedom to work out all that fun middle stuff.

If I get an idea for a scene I can write some notes on it and add it where it belongs. That way, I’ll know exactly where to add that scene once I catch up to it. And when I’m sitting there, all out of Mike ‘n Ikes, my mouth hanging open as my gears try to get the writing going, I can look at the board and know what I’m supposed to work on next.

Whew! That was a lot of info! If you have any questions, feel free to ask them in the comments and I’ll do my best to answer in there. 

About the author

Ali Cross is the sensei of the writer’s dojo where she holds a black belt in awesome. She lives in Utah with her kickin’ husband, two sparring sons, one ninja cat, two sumo dogs and four zen turtles.

She’s the author the young adult urban fantasy series Desolation, and a member of the Author’s Incognito Executive Committee.
Blog Facebook Twitter

Blake Snyder’s Save the Cat plotting method

This entry is part 22 of 24 in the series The plot thickens (Mwahahaha)

Planning out a novel? Be sure to join my newsletter for a FREE plotting/revision roadmap, and check out the full series on plotting novels in a free PDF!

Our series on plotting is a perennial favorite on the blog, so we’re expanding on that series with a few guest posts! Ali introduced me to Save The Cat! and I really loved using it on my most recent manuscript, so she’s here this week to explain the basics of his plotting method.

By Ali Cross
Used with permission from this post

A couple weeks ago I posted some pictures of my office, including a pic of my new “beat board”.


Several of you asked me to explain what this is and how I use it. I’m borrowing heavily from a post I did pre-NaNo 2011, so some of you will have heard this before. But for those of you who are new to the wonder of Beat Boards, strap in and let’s go!

I am completely gaga over the screenwriting book, Save The Cat. If you haven’t read it yet, I completely, 100%, highly recommend it. In the meantime, here are the highlights as they apply to me and how I write a novel.


Using the document below I fill in a sentence or two that addresses that “beat” or plot point (I’ve also included a question that helps me in this task). You can go here to get a fantastic beat-by-beat breakdown of where these beats should land in your manuscript, depending on the anticipated length of your novel.

THE BLAKE SNYDER BEAT
If you’d like more information, there’s lots to learn on Blake Snyder’s website

PROJECT TITLE:
GENRE:
DATE:

1.Opening Image: Set the scene. Who is/are your main character(s) and what is their world like before your story begins?

2.Theme Stated: What will your character’s arc be? What is the moral of your story? Usually the theme is stated by a supporting character. What is the moral of your story?

3.Set-up: Pretty self-explanatory, right? This is where all the pieces are put into play. Who are the main players and where is your story set?

4.Catalyst: Again, you know this one. A chain of events that set things into motion. What happens to change your main character’s world?

5.Debate: This is where your MC has to make some decisions about what he’s going to do. What choices does your main character have to make?

6.Break in to Two: The transition from static MC to MC on the move. What new adventure is your character on?

7.B Story: This is where you move into the second act of your story, or, the dreaded middle section. (duh duh duhhhh) It’s usually the B story, or the love story, or the big action/adventure story of your book. What is the new relationship in your main character’s life?

8.Fun and Games: Pretty much more of all the love, the action or … whatever! (Yeah, you can tell I love mid-sections!) What kind of trouble does the main character get into?

9.Midpoint: This is like a mini act-break. It’s the corner you turn toward the second half of your book, like your MC is standing on a cliff and needs to decide: fight or flight? What happens to make the character think everything is awesome or everything is awful?

10.Bad Guys Close In: Your MC hasn’t jumped, but the bad guys are almost there and …. maybe there’s still time to jump! What stands between your characters and what they want?

11.All is Lost: It looks like the Bad Guys are going to win. Sad. 🙁 What happens to make your character think they’re not going to get what they want?
12. Dark Night of the Soul: Your MC has to decide if he’s just going to give in, or if there’s still some fight left in him. Why does your character consider giving up?

13.Break into Three: Another all-important corner. This is where the MC makes his DECISION. And we being our movement forward with purpose. What does the character do to make a last ditch effort to get what they want?

14.Finale: Wrap up the B story, wrap up the A story. What does your main character do to turn things around?

15. Final Image: Usually a mirror image of the opening scene. This shows us how the MC’s life has changed, how the theme played out and how all the questions you posed are answered. What is your character and their world like now that their adventure is over?

Yes these are overly simplistic, but you get the point. Answer these questions, get these “beats” straight in your head and ta da! You now have all the building blocks necessary to get to work on your manuscript.

Next time: how to use the the beat board . . .

What do you think? Have you read Save the Cat? Come join in the discussion!

About the author

Ali Cross is the sensei of the writer’s dojo where she holds a black belt in awesome. She lives in Utah with her kickin’ husband, two sparring sons, one ninja cat, two sumo dogs and four zen turtles.

She’s the author the young adult urban fantasy series Desolation, and a member of the Author’s Incognito Executive Committee.
Blog Facebook Twitter

Book trailers: Yes or no?

Book trailers are short videos designed to promote your books like a movie trailer does for a movie. But are they effective?


I haven’t read this book, but the obviously professional production and the VERY short run time caught my eye

The Yes Camp

One theory of marketing says that every time a potential customer sees your product (read: book) name increases the likelihood of a future purchase. The tipping point, in this theory, is that it takes seven of these exposures before someone makes a decision to buy.

A book trailer can be one of these exposures. Realistically, odds are low that you can definitively trace any particular purchase back to any particular marketing tactic, but rather the collective total of those exposures. Anything you can do to help get your book out there and gain publicity and most importantly eyes will help your sales in some way.

Although book trailers are used more and more often, they can still be a unique way to catch the eye of a potential readers. Award-winning and bestselling authors use them (well, their publishers do). They’re a fast way to catch someone’s attention and convey a lot of information about your book in an intriguing way.

Possibly the biggest advantage is that a good, interesting book trailer is inherently share-able, or it should be if you manage it right! People who see your book trailer and get excited about your book, or even just the trailer, can post the trailer to their blog, Facebook or Twitter feed, exposing even more people to your book. This can be especially beneficial for mid-list and self-publishing authors.


Teaser trailer for my friend Don Carey’s book. Legos!

The No Camp

Like many people, I don’t think I have ever seen a book trailer and thought even so much as, “Hm. I might like that.” In fact, the only times I’ve purchased a book after watching a trailer, I’d made the decision to buy before I’d seen the trailer.

Additionally, book trailers can be expensive. They’re all too often amateurish, and that will never help your marketing efforts. The “medium mismatch” of the printed word and the visual storytelling of film sometimes doesn’t work out so well, and you have to consider whether book trailer viewers are your target audience at all.

In short, the no camp varies from apathetic to militant opposition to this marketing tactic, which they decry as a useless waste of time and money.

Making the call for you

Whether or not you decide to do a book trailer for your own book is a personal decision. Here are a few factors I think you should consider:

  • Do you have the video software and skills to do it yourself? (There are several free video editors.)
  • Are you willing to learn?
  • Do you know (of) someone who can and will do it cheaply and well?
  • Do you want a book trailer?
  • Do you have realistic expectations of the results?

Have you decided? Great new if you’re in the “yes” camp: next week, we’ll look at how to make an effective book trailer!

What do you think? Do you want a book trailer? Would you make it yourself? What else would you ask yourself before deciding? Join in the discussion!

Agent and editor wish lists!

I love seeing what editors and agents are looking for. Just the ideas can be inspiring, or at least funny. Here are a few agent and editor wish lists I’ve found recently (in reverse chronological order):

UPDATES: Agent Sara Megibow shares more of her requests from editors at Romance Writers of America 2012 on 1 August 2012, including:

  • Novella-length eBook originals
  • Contemporary YA with strong romance
  • Regency and non-Regency historical romance
  • And more!

Check out her article in the Nelson Literary Agency August newsletter.

AND Entangled Publishing actually has a more recent wishlist than the one listed below, this one from 2 July 2012.

AND literary agent Laura Bradford tweeted some of her wishlist:

AND Sara Megibow continues to be helpful:


And all the previously mentioned lists:

Literaticat Jennifer Laughran at Andrea Brown Literary Agency posted her young adult and middle grade wish list on 25 July 2012, but be sure to read the caveat. (I can’t open the site in Chrome because of a wonky script; Firefox works.)

Entangled Publishing periodically features wish lists from several of their editors. The most recent editor wish list is from 1 June 2012. Entangled specializes in romance, and publishes in a variety of subgenres and lengths.

As of 23 May 2012, agent Carly Watters of the PS Literary Agency is looking for several genres of fiction, nonfiction, YA and picture books.

Agent Kristin Nelson of Nelson Literary blogged about Why asking about the next trend is wrong, listing a few things she’d really like to see, but more importantly stating that she’s constantly surprised by what she falls in love with, on 13 April 2012.

February 2012, the new Bright Literary Agency posted what they’re looking for in children’s (picture book to YA) fiction.

Mary Kole of Movable Type Management, and author of the KidLit blog, keeps a children’s fiction wish list in her sidebar.

Hungry for more wishes? Gabrielle Prendergrast collected a similar wish list list in March 2012.

You know what I don’t see? My book in any of these lists. But that’s okay. As other agents remind us:

So don’t be discouraged—just get out there and submit!

What do you think? Do you like agent wish lists? Come join the conversation!

Photo credits: kitty wish list—Shawn Rossi; Dear Father Christmas—Rob Enslin

Blogging: Intro to HTML

This entry is part 8 of 8 in the series Marketing: blogging

Ever had a blog post do something crazy? Weird highlighting, changing fonts, double spacing? Learning even a little HTML can help you troubleshoot those crazy errors.

On Friday, I gave this presentation at the iWriteNetwork conference, and I thought it would go well with the blogging series we did a little while back, so I’m sharing it here today.

To find the HTML in your blog, above the post window, find the “HTML” button or tab. It will show you the HTML codes that present your document.

Some HTML basics

HTML stands for HyperText Markup Language.

When I want to look something up in HTML coding, I usually Google it, and click on any result from http://w3schools.com.

To “turn on” a style or feature, put it inside less than/greater than signs, like this:

<b>, <em>, <strong>

To “turn off” a style or feature, add a slash after the less than:

</b>, </em>, </strong>

Everything between those two tags (technically elements, but we’ll go with tags) will obey those tags.

A few tags are “self-closing,” and have that slash at the end, right before the greater than sign. Image tags and line breaks are two of these:

<img src="picture.jpg" /> (always use straight quotes!)
<br />

Formatting text for the Internet

Centering—there are two methods to center text. I recommend picking one and memorizing it.

<p style="text-align: center;">Centered text</p>
<p align="center">Centered text</p>

Bold—again, there are two methods; pick one

<strong>Bold text</strong>
<b>Bold text</b>

Italics—yep, two methods.

<em>Italic text</em>
<i>Italic text</i>

Styling text, from color to line spacing, is done mostly with a p element or a span element. P is for whole paragraphs, Span is for text within paragraphs.

Begins with:

<p style=" or <span style="

Must be STRAIGHT, not curly or “smart” quotes!

Inside those quotation marks, you can change all kinds of things about your text. All of the following “properties” must come INSIDE those marks, and include the semicolon. (Use just ONE of each tag.)

Color

color: red; OR color: #FE7898; [a HEX code] OR color #555;
[For HEX codes that are the same digit/letter]

Size

font-size: 14px; OR font-size: 14pt; OR font-size: 2em; OR font-size: small;

Background

background-color: yellow; OR other styles for color

Line spacing (all these are about double spaced)

line-height: 200%; OR line-height: 2; OR line-height: 25px;

Font gives several options to browsers to figure out a type of font to display

font: Georgia serif;

Once you have everything you want to change about your text, close the quotes and tag: "> (And remember </p> after the paragraph text!)

For example:

<p style="color: red; font-size: 20pt; background-color: #555;
text-align: center; line-height: 200%;">Here is my sample
paragraph. It's pretty hard to read with the gray background and
red text, so I really can't recommend using this exact color
scheme, but you get the idea.</p>

Gives us:

Here is my sample paragraph. It’s pretty hard to read with the gray background and red text, so I really can’t recommend using this exact color scheme, but you get the idea.

Outline format: headers

HTML comes with an outline format that uses headers, <h1> through <h6>.

The highest level header is for your site name. Typically, there will be only one <h1> element on a page.

<h2> elements are often used for post titles. There can be more than one <h2> on a page.

I use <h3> elements for subheadings inside my blog post. You’ll notice they’re purple here 🙂 .

Images

IMG stands for image and SRC stands for source. That’s where the URL of the image itself will go. The rest of the properties are optional, but I recommend at least using the alt text, and included a search keyword, if you’re looking for a (slight) SEO benefit.

<img src="imageURL.jpg" height="80" width="60" alt="the best
dog in the whole world!" align="right" style="float: right;" />

Note that if you want the top of your image to be inline with the text, you’ll want the code for the image and the text together, without line breaks (hard returns or <br />), and the image must be right or left aligned. Like this:

<img src="imageURL.jpg" height="80" width="60" alt="the best dog
in the whole world!" align="right" style="float:
right;" />This text will line up with the TOP of the image.

Links

Links are the currency of the web! The Link anchor text is the text that shows up colored and underlined when you look at the post. Search engines use the actual anchor text as a vote, so describing your friend’s site with “click here” isn’t as helpful to their SEO as it would be to say “sci-fi author Jane Doe.”

To make a link, you use an “a” (anchor) element, with HREF (hypertext reference)

<a href="URL.html">Link anchor text</a>

You can also use “a” elements to link to a specific part of a document. For example, if I wanted to make a link to the text formatting section of this document, I would insert this HTML code just before the subheading. (“format” is the name I chose; you can use anything you like.)

<a name="format"></a>

There’s no text required—it makes any text look like a link, but it’s not clickable, so I skip it.

Then, to link directly to that part, use:

<a href="pageURL.html#format">Link anchor text</a>

These anchors also work on the same page. Here’s that link to the text formatting section on this page.

Special characters: HTML Entities

I have a few of these memorized, but I often just Google the name of the character and “html entity” if I need to find it. Include both the ampersand and the semicolon.

  • Straight apostrophe: &apos;
  • Accents, e.g. é: &eacute; [the direction of the accent] OR &#233; [the alt code] — the ‘e’ is case sensitive!
  • Ampersand: &amp;
  • Straight quote: &quot;
  • Less than: <
  • Greater than: >
  • Cent: &cent;
  • Copyright: &copy;
  • Em dash: &mdash;

Two quick cut-and-paste tips

If you look at your HTML code and see that every paragraph has a line-height: 200%; property that you don’t want, I recommend cutting and pasting the code into Notepad (Text Editor on a Mac, I believe) and using Find and Replace to get rid of it.

Pasting text from an email or Word doc? I recommend pasting the text directly into the HTML window or Notepad/Text Editor. Notepad makes it easier to add line breaks between paragraphs, and find and replace any characters that won’t display properly. You will need to add bold or italic formatting manually.

Troubleshooting

Go find a crazy post on your blog and dig into the text to see if you can find out why it’s displaying oddly.

Note: If you’re trying to put two images with captions side by side in Blogger, you will need to use a table. Blogger puts the caption into a table row below the image and won’t display two tables side by side.

Don’t have a crazy post? Cut and paste this code into a new post and preview to see what’s displaying strangely. Then dig into the code to fix it!

<p style="background-color: red; text-align: right;">We use
crutches when we're lame. Gesture crutches? <strong>They're often
a symptom of writing that's limping along.</strong> Don't let your
writing limp! Make it run, jump, dance and sing!</p>
<strong>Describe the laugh</em> to make it pop. Write it fresh!
"A suuuure-you-can laugh" or "Her laughter was bright and thin
 and tinny, like the sound of cheap jingle bells you buy one
year—and the next find inexplicably silent."
Is this hard work? <strong>YES!</strong> Is it worth it? We
can&mdash;well, actually, we probably <em>can't</em> cite
<a href="http://example.com">examples of less-than-engaging
writing in published books: unless they're book-throwing bad, we
tend to gloss over this boring body language just like we do a
lot of other unstellar examples.

Can’t fix your crazy posts? I’m happy to help! Come join in the conversation!

Photo by Jesper Rønn-Jensen

Fixing the Top 10 Gesture Crutches!

This entry is part 3 of 3 in the series Gesture crutches

We’ve looked at multiple ways to find your cliché gesture crutches . . . now what? How do we fix these little gestures that creep into our conversations and our manuscripts—eventually weighing down every single scene?

gesture crutchesWe use crutches when we’re lame. Gesture crutches? They’re often a symptom of writing that’s limping along. Don’t let your writing limp! Make it run, jump, dance and sing!

Here are my top ten gesture crutches that I either write or see too often, and how I fix them. Note that the top ten will vary from person to person. I do not eliminate these words completely from my manuscript, but I try to make sure that I don’t use them too often or too close together, and when I do use them, they should be as fresh and unique as the scene can handle.

How do I tackle all this?

First, in a paper edit, I use one of the techniques from Wednesday, writing down the body parts/action in the margin, then reading those notes aloud for pattern and repetition. I make notes and adjustments based on that.

Later, I use a macro to “harvest” all the sentences containing those terms from my WIP. Rather than using find thousands of times, I go through that new document and make a note of a few things in the document:

  • patterns (she smiled in joy, she smiled in gratitude, he frowned in disapproval, etc.)
  • echos (“my heart kick starts” and “my pulse jumpstarts,” especially fairly close together)
  • uses too close together
  • uses that don’t make sense (could be the lack of context, but I made a note to check)
  • uses that aren’t necessary
  • uses that are awkward
  • uses that could be fresher
  • uses that are “bare” and could just be filler action tags: i.e. Jimmy frowned. “What do you mean?”—punch up, freshen, replace or cut. (Gasp! You could use a dialogue tag!)

On my first pass, I’m only marking the things I want to look at, unless inspiration for a rewrite strikes. Then I go back through and make the changes in the manuscript.

Fixing those crutches!

As I go through each set of sentences, I look at those notes and strategize how to make my changes. Here are some of the alternatives I’ve thought about for the following 10 gestures. Note that a lot of these strategies can work for all body language cues, so there’s a bit of repetition between the lists.

Nods

Characters who nod too much are liable to have their heads fall off, or at least sound like bobbleheads.

  • Give a character (most likely just one) a unique, character-specific gesture—I used eyebrow-nods (it only happens 2-3 times).
  • Change to just “agrees.”
  • If the character is complying with a request, cut the nod altogether and just have them obey.
  • If they were just nodding at something/someone, consider using gesturing, pointing, indicating with eyes, jerking head, tapping, etc.
  • Convert some nods to dialogue: “Yes/yeah/sure.”
  • Cut anything unnecessary.
  • Punch up ones that remain, as much as you can in their context. A few examples of fresher nods to get your juices flowing:
    • a single, decisive dip of the chin
    • a yeah-sure-we’ll-see-about-that nod
    • “The receptionist smiled and nodded in that way people do when they aren’t listening.” —Harlan Coben, No Second Chance

And remember: you don’t ever have to say a character nods her head/up and down/yes. They are all redundant. What else do you nod? How else do you nod? What else does a nod mean after a yes/no question?

Head shake

Again, we’re in danger of losing someone’s head due to stripped out cervical vertibrae. Just don’t.

  • Convert to dialogue! From a flat-out “No” to a muttered “unbelievable,” dialogue can not only carry so much more impact than shaking one’s head, it can also make your meaning clearer without resorting to a pesky adverb.
  • Use another gesture to portray the meaning: a sigh (if you haven’t already overused those!), a tongue-cluck, a wagging finger, etc.
  • Use another verb for “shake”: wag, . . . . uhhhhh . . .
  • Cut.
  • If a lot of your head shakes are being used to convey the same message (other than no—maybe disbelief or disappointment), then take a little while to sit down and think about all the ways you can convey that nonverbally. Watch people, watch reality TV, watch well-acted movies, and see how those people look when they’re experiencing that emotion. Look for subtle and unique tells. Check out The Emotion Thesaurus, or this writers’ game, where you pick the body part first for more ideas.
  • Try “disagrees,” “demurs” or other d words. I mean verbs of disagreement.
  • If you have to have to have to keep it, punch it up! Maybe your character shakes his head like a dog getting out of the washtub, or like he’s afraid it’ll fall off, or like he’s wearing a neck brace.

Smiles

I swear, sometimes my characters sound like grinning idiots. Smile at this; smile at that. Save the smiles for when it counts, not just as a conversational smoother.

  • Try other words, like beams or grins—but these are easy to overuse, too! I try to check these one after another.
  • Give the character a particular type of smile. Maybe he smiles like a feral dog or a jack o’lantern, or a presidential candidate.
  • Use subtext or dialogue to convey approval, gratitude, or other messages.
  • Write it fresh! Give it a message, or use a simile to compare it to something (that isn’t a cliché). Some fresh smiles to get you thinking:
    • “‘They’re all in there waiting for you,’ she said, flashing an I’m-glad-I’m-not-you smile.”—Angela Hunt, The Note, via Margie Lawson.
    • From my WIP: “He orders two coffees with his I’m-so-charming-you-should-throw-in-something-for-free smile.”
    • My favorite smile in all literature (can we say amplified?): “He smiled understandingly—much more than understandingly. It was one of those rare smiles with a quality of eternal reassurance in it, that you may come across four or five times in life. It faced—or seemed to face—the whole external world for an instant, and then concentrated on you with an irresistible prejudice in your favor. It understood you just as far as you wanted to be understood, believed in you as you would like to believe in yourself, and assured you that it had precisely the impression of you that, at your best, you hoped to convey.” —F. Scott Fitzgerald, The Great Gatsby

Raised Eyebrows

One raised eyebrow. Two. Three. It doesn’t matter. The gesture can mean anything from surprise to disbelief to sarcasm. It’s too generic and overused to mean much of anything these days: a classic cliché.

  • Think about the underlying emotion and find other gestures that might convey it more clearly, especially since “he raised his eyebrows in confusion” becomes not only a cliché but also telling. Watch people, watch reality TV, watch well-acted movies, and see how those people look when they’re experiencing that emotion. Look for subtle and unique tells. Check out The Emotion Thesaurus, or this writers’ game, where you pick the body part first for more ideas.
  • Cut.
  • Use dialogue to convey the response or emotion.
  • Write it fresh! Use a unique verb, describe their movement in a unique way, or show the message you’re trying to send. A few of my quick, fresh eyebrows:
    • His eyebrows jumped to meet his receding hairline.
    • “Uh huh,” he said, his eyebrow propped up an inch.
    • She raised her eyebrow, nailing him with that patented mother-knows-better-than-you look.

An exception to the rule: most of the time, you don’t have to eradicate these words, but I think I’ll be eliminating the majority of my plain eyebrow raises.

Glance

It’s like my characters can’t look at anything for very long. Focus, people! You do not have ADH—squirrel!

  • Use another verb. Be careful not to overuse synonyms or use words so unusual that they call attention to themselves.
  • If it’s the POV character, just show what s/he saw and skip the filter word.
  • If the glance is less to see something and more to convey a particular message, spell out the message in a fresh or funny way.
  • Ooor use dialogue for that fresh, funny message.
  • Write it fresh!

Furrowed brow (or eyebrows drawing together)

In my latest manuscript, the only time I mentioned “brows” was when they were furrowed. Which makes mine furrowed, too.

  • Use a simile. Lots of things are wrinkly: pugs, my laundry, septuagenarians. Note: are stormclouds overused in this context?
  • It seems like this expression rarely occurs in isolation. Focus on another part of the face or the body language. As always, this is best with a gesture or body part that’s specific and unique to the character.
  • Watch either of these in the POV character. Both can sound like an external visual instead of the character describing his/her own conscious movements.
  • Write it fresh! Some fresh eyebrows & brows to get you rolling:
    • She looks like Our Lady of Perpetual Solemnity.
    • His eyebrows pull together in knit two, purl two ribbing. (Want to get uberjargony? Say “k2p2 rib.”)
    • The gray caterpillars above his eyes lean in for an intimate moment.

Eyes widen/narrow/light up

I make my characters’ expressions while writing. . . . I probably look like I have crazy eyes!

  • Find another body part or part of the expression to highlight. I’m searching for a good way to write the feeling of your scalp tightening when you’re surprised.
  • Use a simile. Can her eyes light up like a firework or narrow like a camera lens?
  • Go for dialogue instead. In Mr. & Mrs. Smith, Brad Pitt’s character tells Angelina Jolie’s that when he first saw her, she looked like Christmas morning. A kid’s eyes lighting up on Christmas morning would have been a cliché; instead the writers used a metaphor an narrowly avoided the tired phrase.
  • My favorite way to write it fresh: Find a character-specific situation to describe in a simile. What would make her eyes narrow? A lying ex? A too-good to be true sale? A delinquent teen? What makes his eyes light up? Hot girls? A challenging math puzzle? The latest FPS video game?

Laugh

I’ve written whole conversations where the characters just take turns laughing. But laughing is one of those things: if the character laughs, the reader doesn’t have to.

  • Is it really that funny? “LOL” really means “I found that amusing” these days. Don’t overuse laughing with your characters that way.
  • Is a response necessary? Sometimes you can cut the laugh altogether.
  • Use dialogue, and if you’re already using dialogue, drop the laughter.
  • Consider a synonym for laugh, but most chortles and guffaws draw attention to themselves.
  • Describe the laugh to make it pop. Write it fresh!:
    • A suuuure-you-can laugh.
    • Her laughter was bright and thin and , like the sound of cheap jingle bells you buy one year—and the next find inexplicably silent.

Sigh

Okay, I’m being sarcastic about the other gestures, but I really did once write a scene where a character decided not to sigh, thinking everyone else was doing enough moody exhaling for them all.

  • Especially watch for clichés like “a sigh of relief.” Write it fresher!
  • If they’re not absolutely necessary, delete!
  • Look at the underlying emotion. How else might it be manifest? Vocal tone? Shoulders, fists,
  • Look at another narrative mode. Would it be more powerful to describe the reason for the sigh in thought, or better yet, dialogue?
  • If you must use several sighs, you might consider finding a way to punch them up systematically. In Paranormalcy by Kiersten White, one of her characters is introduced early on as speaking a “professional sigher.”
  • Kiersten White goes further than that, describing those sighs with the message they send:
    • “This was more of a sympathetic, I know what it’s like to be a human wrapped up in all this non-sense, but if we didn’t do it, who would? kind of a sigh” (12).
    • “Raquel gave me her best why is it always me that has to deal with these things sigh (one I was well familiar with at this point), then patted me on the shoulder” (20).
    • “She gave a can I just start shocking him into submission now sort of sigh” (25).

Gaze/Eyes

Aside from the eyes widening, narrowing or lighting up, they tend to do a lot of other things to convey meaning. Although I would NEVER recommend cutting all the eyes (ouch!), watch out for using too many eyes in one scene. Even alternating them with gaze might not work if that’s overused, too.

  • Track the usage: are those gazes/eyes, meeting, avoiding, lowering, falling, etc. too much or in too close proximity?
  • Alternate gaze/eyes—within reason! Don’t describe a gaze with the color of the eyes, etc. (A blue gaze? No.)
  • Try an alternative noun, as long as they’re not overused, too (many of these are on my watch list!): stare, (fixed) look, scrutiny, inspection, regard.
  • Or, if it’s a verb, try an alternate verb (again, many of these are also on my watch list): stare, look (fixedly), gape, goggle, eye, study, scrutinize, ogle, eyeball, observe, view, contemplate, regard, survey, consider, watch, check out, size up.
  • Use a nickname for the eyes, or bring out a character description or personality with them. Perhaps a flirtatious character bats his baby blues.
  • Maybe being more general might help, using the word face or expression.
  • As always, look at the underlying message. How else can you portray that in body language? Hands touching/not touching/pulling away? Physical proximity? Turning toward or away?
  • Consider whether the message might carry more power as a thought or dialogue, if appropriate.

In conclusion

Is this hard work? YES! Is it worth it? We can—well, actually, we probably can’t cite examples of less-than-engaging writing in published books: unless they’re book-throwing bad, we tend to gloss over this boring body language just like we do a lot of other unstellar examples.

I can’t help but believe this level of care, attention and effort pays off in your writing.

Final note: Let me say again that I don’t feel compelled to change every use of everything. I left my share of nods, smiles, and eyebrows in my latest manuscript. If we didn’t use these body parts and actions, our writing probably wouldn’t feel realistic. But now I feel my writing is more engaging because I’ve eliminated the superfluous, meaningless, confusing and repetitive.

What do you think? How do you fix these gesture crutches? Is this worth it?

Photo credits
crutches on orange backgroundChristian Guthier; “smile”—Andy Hay;
crutches through window—Amy van der Hiel; sigh—Lucy/squacco

Writing crutches: How to avoid overusing the most common gestures!

This entry is part 1 of 3 in the series Gesture crutches

This is one of my favorite, most useful posts. Since we mentioned editing gesture crutches recently, I wanted to share it again!

I’ll admit it: I’m addicted to gesture crutches. I use them over and over again throughout a book or chapter or sometimes even scene. It’s like I can’t stop, especially when I’m drafting!

gesture crutchesWhat are gesture crutches, and why should we avoid them? As editor Michaela Hamilton said in an revision letter:

Don’t resort to overused gestures such as shrugged, nodded, sighed, shook his head. These are ok occasionally, but in general, seek more vivid gestures that tell more about a character, help set a mood, and create visual dimension in the scene.

Guilty as charged [author John Gilstrap writes]. My problem here is that the ones she notes are the only conversational gestures that I know of. I stipulate that I overuse them, but if anyone has other gesture arrows that I can add to the quiver, feel free to speak up.

I, too, am guilty as charged. It’s tough to come up with original gestures, and sometimes distracting to the reader. (Think we’re alone in struggling with this? Check out this thread on Nathan Bransford’s forums.) While critique partners and editors are pretty much a must-have for the ultimate solution, I’ve found a couple ways to check myself on gestures.

Using character-specific, unique gestures

A couple weeks ago, I finished Brandilyn Collins’s Getting Into Character: Seven Secrets a Novelist Can Learn From Actors. Her very first secret, “Personalizing,” describes the process of finding a unique gesture for a character. Her example is of a rich, insecure woman who dislikes her hands, but wants to show off her ring, a symbol of her wealth. Can’t you just imagine how a woman like that would hold her hands? (It’s a conflicted gesture!)

Writing simple gestures more creatively

my cousin and her friend collect pictures of themselves shruggingI also heartily recommend Margie Lawson‘s course on Empowering Character Emotions, which covers these repetitive gestures and how to write them “fresh” and “empowered,” when necessary—and how to tell when they’re not necessary at all. I also have her lecture packet on Writing Body Language and Dialogue Cues Like a Psychologist, which I’m sure builds upon those same principles (but I haven’t chiseled out the time to read it yet. Shame on me!). Margie teaches Empowering Character Emotions online in March (it was $30 last year) and the lecture packets are available year-round ($22—both are a great deal!) (and I only wish I were affiliated with her 😉 ).

Come up with a stable of original expressions

This is also from Margie Lawson (with a little interpretation from me). I realized I have a lot of sarcasm in my MS (which I love), and there were only about five gestures of sarcasm (folded arms, rolling eyes, one raised eyebrow, scoffing, pursed lips, if I remember correctly). Since I already knew the emotion I was going for, I set out to write some original, creative gestures that conveyed sarcasm. Then I had a collection of gestures to draw on and even extrapolate from further. I also found The Bookshelf Muse’s Emotion Thesaurus super-helpful!

Pick the body part first

You could do any of these by picking a lesser-used body part. I once played this writers’ game where two members of the group had to act out a scene and the rest of us had to write about their emotions using assigned body parts. I had wrists and heels. It was awesome! One character stomped around hard enough to leave half-moons in the cement floor. Another offered apologetic wrists. Another had her arms fly open like windshield wipers. Will I ever use those? Maybe not. But that kind of vivid, imaginative imagery can help you create better, more appropriate images.

Monitoring your gestures

I’m proudest of this one because I came up with it myself (extrapolated from Margie’s EDITS system). When editing a scene, make a note of what body part/area is used in the line: hands, eyes/eyebrows, shoulders, lips/mouth, etc., in the margin. Then read the list aloud for the whole scene/chapter. This helped me pinpoint repetitive or too-similar gestures in close context as well as look at the gestures themselves. If I found I had ARMS too close to one another, I could look at those two gestures quickly and easily to see how similar they were.

Pull out the sentences en masse

New to the 2012 edition! I wrote a bit of code to make Word pull out all the sentences that use these gesture crutches, and you can customize it to your word list (there’s also a great version by Paul Edelstein for code-o-phobes!). I’ll probably still use the monitoring technique above to make sure I’m not using any one body part too often in a scene, but now I can focus on just my use of smiles or nods throughout the book to make sure they’re necessary, not repetitive, and fresh.

What do you think? How do you keep yourself from repeating the same conversational gestures?

Photo credits: crutches on orange backgroundChristian Guthier; my cousin’s Facebook.